Home / First trade / The complete Binance sign-up guide
The complete Binance sign-up guide: the referral field, and where verification stalls
Opening the account is easy. Three small things are not: the referral field is collapsed by default, rejections do not tell you exactly what was wrong, and security setup is easy to put off. This covers all three.
One: what the rules are for crypto where you live — nobody can look that up for you and jurisdictions differ enormously. Two: a valid identity document in your own name, matching the bank account you intend to use. Three: an email address you actually control, with two-factor already switched on. Have all three and most of the rework disappears.
This is written for someone opening their first exchange account. It runs longer than most guides because it covers the three steps where the process can stall: where the referral field is, why identity verification gets rejected, and what to configure the day it clears. If you want the short route, skip to section two.
The eligibility conditions, verification requirements, retry limits and feature availability described here reflect public information as of 2026-08. Rules of this kind change with region, account type and policy, so check the current pages in the Binance help centre before you act. This site has no affiliation with or agency relationship to Binance.
One: eligibility, before you spend time on documents
Why this step exists: exchanges restrict service in certain countries and regions as a compliance obligation. Nothing personal about it. Confirming you are not on that list before uploading documents is a good deal easier than asking why verification failed afterwards.
Three things to check
- Where you live — restricted-region lists get revised, so read the platform's current terms of service.
- Which document you plan to use — passport, national ID or driving licence differ in acceptance and in what they unlock; a passport is generally the most universally accepted.
- Your age — every platform has a minimum.
Also worth saying: do not use anyone else's documents and do not let anyone use yours. Beyond breaching the terms, it can pull you into something considerably worse — see the frozen accounts piece.
App or browser?
Both complete the whole process; the choice is about later habits.
The browser lets you see the address bar and confirm which domain you are on, which is genuinely valuable against impersonation. The downside is that the liveness check during verification works poorly on a computer, so you will likely end up using a phone for that step anyway.
The app handles verification smoothly and delivers notifications reliably. The downside is that there is no domain to inspect, so the app itself must have come from the system store — non-negotiable; method in the three checks.
A workable split is to use both: the browser for day-to-day work, the app for notifications and verification. That keeps a domain to check without losing convenience.
Two: signing up, and the one field to watch
Email, phone, or a third-party account
The sign-up page usually offers three routes: email, phone number, or continue with another platform's account.
Use email. Three reasons: phone numbers stop working when you change number or country; a third-party account ties your exchange account to another platform's fate; and email is the one you can fully control and separately harden.
If you go with email, make sure that mailbox already has two-factor enabled. Email is the recovery route for everything else — if it falls, nothing downstream holds. I will say that twice in this article because it matters.
The registration itself is straightforward: enter an email, set a password, complete one verification, and the account exists. Usually under two minutes.
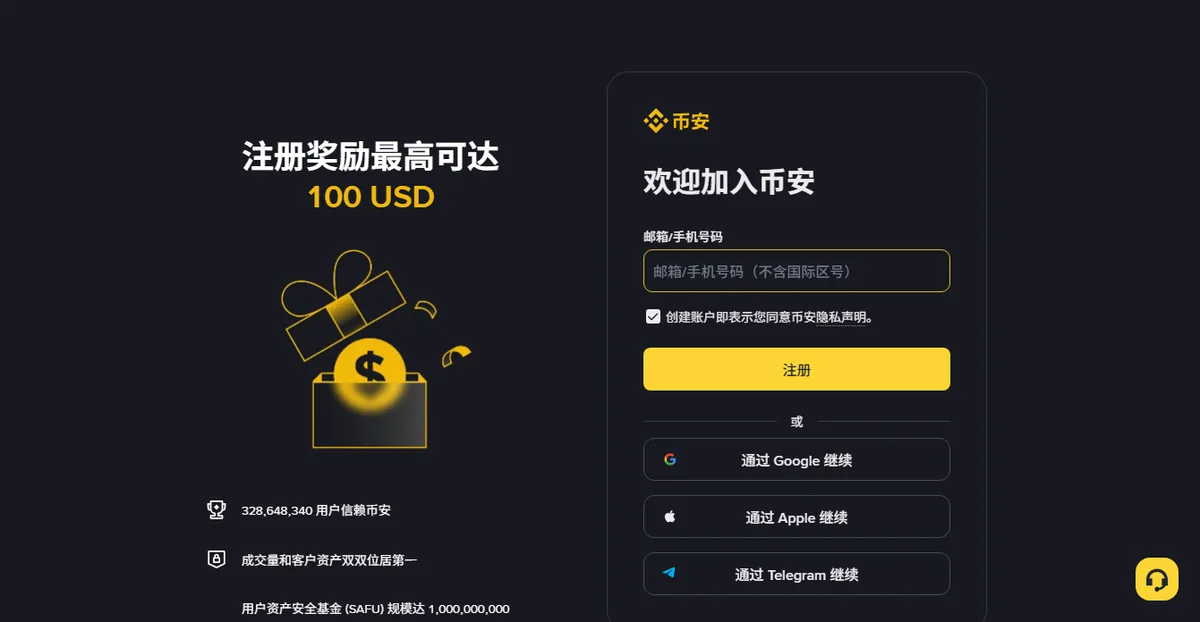
There is exactly one place to be careful: the referral code field. It is collapsed by default, so it is easy to press continue without ever seeing it. It can only be filled during sign-up; it generally cannot be added afterwards.
- Open the sign-up pageThrough an entry point you confirmed yourself. How to verify one is in the three checks.
- Enter your emailEmail is more durable than a phone number. That mailbox needs two-factor.
- Set a password used nowhere elseCredentials leaked from somewhere else and replayed here are one of the most common routes into an account — and this is the one link in the chain entirely under your control.
- Expand the referral field and fill it inIf you cannot find it, search the page for "referral", "invite" or "Referral ID".
- Complete the email or SMS verificationType the code only into the page you opened yourself, and never read it out to anyone.
Our referral code is below. Expand that field on the sign-up page and paste it in; eligible new users can receive a reduction on their trading fees.
How large the reduction is, and who qualifies, is whatever the Binance page shows when you sign up, and it may change with policy. This site contains Binance referral links and we may earn a commission; signing up with the code does not cost you more (check the current page).
If you would rather go straight in with the code already attached, the form fills it for you:
Go to the Binance sign-up page
This is our referral link and we may earn a commission; signing up through it does not cost you more (check the current page). It opens in a new tab so this page stays where it is and you can follow the steps alongside. Crypto assets are volatile and you can lose your whole stake.
Three: identity verification, and where it stalls
With the account created you still cannot do much. Depositing, peer-to-peer trading and withdrawing all require identity verification first — usually labelled verification or KYC.
Three stages: basic details, document upload, and a liveness check on camera. Smooth cases finish in under ten minutes; busy periods can mean several hours to a day or two.
What to have ready
- The physical document. Not a photocopy, not a photograph of a photograph, not a version on a screen.
- Even lighting — daylight near a window is ideal. No flash.
- A plain dark background such as a desk, with all four corners of the document inside the frame.
- Glasses and hats off, hair away from the face. The liveness step is unforgiving about obstruction.
Why submissions get rejected, in rough order of frequency
| Reason | What it looks like | Fix |
|---|---|---|
| Image quality | Blurred, glare, shadows, a corner cropped off | Change the light, lay the document flat, shoot from directly above, no flash |
| Details do not match | Name or date of birth not exactly as printed | Copy the document character by character; keep the name order as printed and do not drop a middle name |
| Document expired | Past its validity date or close to it | Use one that is currently valid |
| Liveness check failed | Too dark, moving too fast, something obstructing | Find better light, follow the prompts slowly, remove glasses |
| Document type unsupported | The selected type is not accepted for your region | A passport is usually the safest choice |
| Already used | The same document is on another account | One document normally verifies one account; check the platform's current rules |
Rejection is not refusal. You can usually correct and resubmit, but retries are generally limited — so spend five minutes checking the list above before your second attempt rather than trying repeatedly.
Verification levels: why some features still will not work
Many platforms tier verification. The basic level unlocks limited features with limits attached; higher limits or more features require more documentation, typically proof of address.
Proof of address is the usual sticking point, because the requirements are specific: normally a utility bill, bank statement or residence certificate from the last three to six months, with the name and address matching what you entered, and submitted as a complete document — not a crop of the address portion.
For someone starting out with modest amounts, this level is usually unnecessary. Add it when you actually hit a limit.
After submitting, avoid these
- Do not resubmit repeatedly — resubmitting while under review restarts the queue.
- Do not edit the name on the account — that triggers re-review.
- Do not look for anyone offering to speed it up — no such service exists, and anyone approaching you with one is running a scam.
- Do not hop regions with a VPN — rapidly changing login locations trips risk controls and slows things down.
Never upload identity documents through a link, a "support agent", or a third-party page. Leaked identity images get reused to open accounts elsewhere for a long time afterwards, and you will not notice quickly. The relevant techniques are in section nine of the playbooks piece.
Four: the day verification clears, configure security
Do this step now rather than later. It takes under ten minutes and removes most of the trouble that follows.
- Two-factor, using an authenticator app rather than SMSSMS can be hijacked; codes generated in an app never travel over a network. Write the recovery key on paper during setup — it is what saves you if the phone goes.
- Set an anti-phishing codeYou choose a string, and every genuine email from the platform carries it. Fake emails do not know it, so the difference is immediate.
- Turn on the withdrawal address whitelistWithdrawals then only go to addresses you added in advance, and adding a new one has a cooling-off period. Even a compromised account cannot move funds out.
How to do each, and the settings that are easy to get wrong, are in the three things to set up on day one.
Five: getting money in
Opening an account and funding it are separate jobs. Right now the account is empty and the next task is converting local currency into a crypto asset.
The usual route is peer-to-peer: the platform matches you with another user, you transfer money to them, and their USDT is released to your account. The platform escrows the crypto, but the cash moves between two real people.
There is a whole set of rules attached to that — how to choose a counterparty, why third-party payment is never acceptable, what to put in the transfer reference. All of it is in your first deposit. The risks in that step are entirely different from the risks of opening an account, and it deserves its own read.
Where the money lands
A small thing that is easy to be confused by. Platforms have several internal account partitions — funding, spot, earn and so on.
USDT bought through peer-to-peer usually lands in the funding account, while trading happens from the spot account. Hence "I definitely bought USDT but the trading page shows zero" — it is in another drawer and needs one internal transfer.
That transfer is instant and free, because it never touched a chain; it is a bookkeeping entry. Explained in exchange, wallet, chain.
Six: what to check when something stalls
| Symptom | Look here first |
|---|---|
| Verification email never arrives | Spam folder; check the address for typos; try a different mail provider |
| SMS code never arrives | Check the country code; check for a blocking app; switch to email verification |
| Verification stuck in review | Check whether repeated submissions restarted the queue; wait rather than resubmit |
| Login flagged as unusual | Return to your normal network; frequent region changes trip risk controls |
| Bought coins are missing | Check the funding account and transfer internally to spot |
| Withdraw button is greyed out | Usually a cooling-off period after a security change, or an insufficient verification level |
| Cannot place a P2P order | Confirm verification is complete and that the chosen payment method is one you can actually use |
If none of those apply, open an official ticket. Do not describe your account situation in a public group — that is putting your hand up to tell everyone lurking there that here is an anxious user, and the "support agent" who messages you next is there for exactly that reason.
Seven: mistakes to avoid in this flow
- The password is the same as somewhere elseWhen that other site leaks, your exchange account is exposed. Use a password manager, or at minimum give this account its own.
- Only SMS two-factorThe weakest link. An authenticator app takes five minutes.
- Reading a code out to "support"Codes are for you. Anyone asking ends the conversation.
- Name entered inconsistentlyEspecially with middle names or name order. Copy the document exactly.
- Funding with a large amount straight awayThe first deposit exists to prove the process works. Reasoning in how much to put into the first trade.
- No withdrawal whitelistThe last gate, and the one most often skipped.
Eight: why you received slightly less than you bought
If you received slightly less than you bought after your first trade, the reason is simple: the fee came out of the asset you bought.
How to read the rate table, why maker and taker differ, and where the BNB discount and the referral reduction each apply are in the fee schedule, column by column. To check the current numbers, the official fee overview is the only source that is actually current.
Nine: a suggested first week
Having an account is the starting line. This is the pace we would suggest, designed to verify every link in the chain rather than to build a position.
- Day one: finish all the security settingsTwo-factor, anti-phishing code, whitelist, plus two-factor on the email itself. No trading today.
- Day two: a small depositRun one peer-to-peer purchase with a small amount and get familiar with ordering, paying, confirming and release.
- Day three: buy a little, then sell it backThe point is seeing how the fee is taken, which account the balance sits in, and where the trade history lives.
- Day four: withdraw the money back to your bankThe most important step and the most commonly skipped. Whether the exit works matters more than anything else.
- Day five: try one on-chain withdrawalIf you intend to use a self-custody wallet, create an empty one and move a few dollars in and out. Network selection is covered in picking the right network.
- The rest of the week: do nothingWatch the market and watch your own reaction to it. Those few days will tell you more about the right position size than any analysis.
Complete that loop and your understanding beats ten articles' worth of reading — and you will have verified the thing that matters most: money goes in, and money comes out.
Then decide on size. How, in how much to put into the first trade.
Last: whether to open one at all is still a question
By convention this is where a guide says "get started now". I want to say something else.
If you reached this page because people around you are doing it, or because a few videos came past, the best next step is not signing up. It is finishing the first lesson and the playbooks piece. Accounts can be opened any time; money that has gone does not come back on its own.
If you have thought it through, the order in this article is the order we would use: check eligibility, sign up with the code, complete verification, configure security the same day, fund with a small amount, and run one full round trip through buying and withdrawing.
One more thing, unrelated to the steps.
This site recommends signing up to Binance with a referral code, and we do receive a promotional rebate from the platform for it — set out on the disclosure page rather than hidden. It does not change how this article is written: the risks stay in, the advice to slow down stays in, and the list of rejection reasons did not get shortened to move you along faster.
Put plainly, our interests and the reader's line up here. Someone who opens an account, gets defrauded immediately and never logs in again is no good to anyone. Which is why the emphasis throughout is on avoiding the holes rather than on hurrying you through the door. If you decide to wait, that is a fine outcome.
If you are going ahead, follow the first-week pace in section nine. Slow is fine; irreversible actions deserve slow.
Where do I enter the Binance referral code?
In the form on the sign-up page, usually an optional field you have to expand, labelled something like referral code, invite code or Referral ID. It can only be filled during registration and generally cannot be added once the account exists.
Can I add a referral code after signing up?
Generally no. Entering the code is part of the registration flow and there is no field for it afterwards. If the fee reduction matters to you, watch for it during sign-up.
How long does identity verification take?
With clear documents it is usually quick, but during busy periods it can take from a few hours to a day or two. You can correct and resubmit after a rejection, though the platform may limit how many retries you get in a short window — go by whatever the page tells you at the time.
My verification was rejected — what now?
Read the stated reason; the two most common are image quality and mismatched details. Reshoot in natural light with the document flat and the camera directly above, and copy the name exactly as printed. Do not retry blindly, as that uses up the day's attempts.
How many accounts can one person have?
Normally one. Verifying several accounts with the same document is generally detected and can get them restricted. The exact rule sits in the platform's current terms, so check there rather than relying on this page.
Can I use it without completing verification?
Only in a very limited way. Deposits, peer-to-peer trading and withdrawals generally all require verification first. It is a compliance requirement, not an optional step.
The eligibility conditions, verification flow, rejection reasons and feature availability here were checked in 2026-08 against the Binance help centre. Rules of this kind change with region, account type and platform policy, so treat the page as it stands when you open it as authoritative. This site has no affiliation with or agency relationship to Binance.